


Sections 1–2 of the Salesforce integration guide — everything that has to exist in your org before any code runs. Start at the overview.
1. Salesforce setup
Section titled “1. Salesforce setup”Enable the consent model. Setup → Data Protection and Privacy → Make data protection details available in records. This exposes the standard consent objects and adds an Individual lookup to Contact, Lead, User and Person Account.
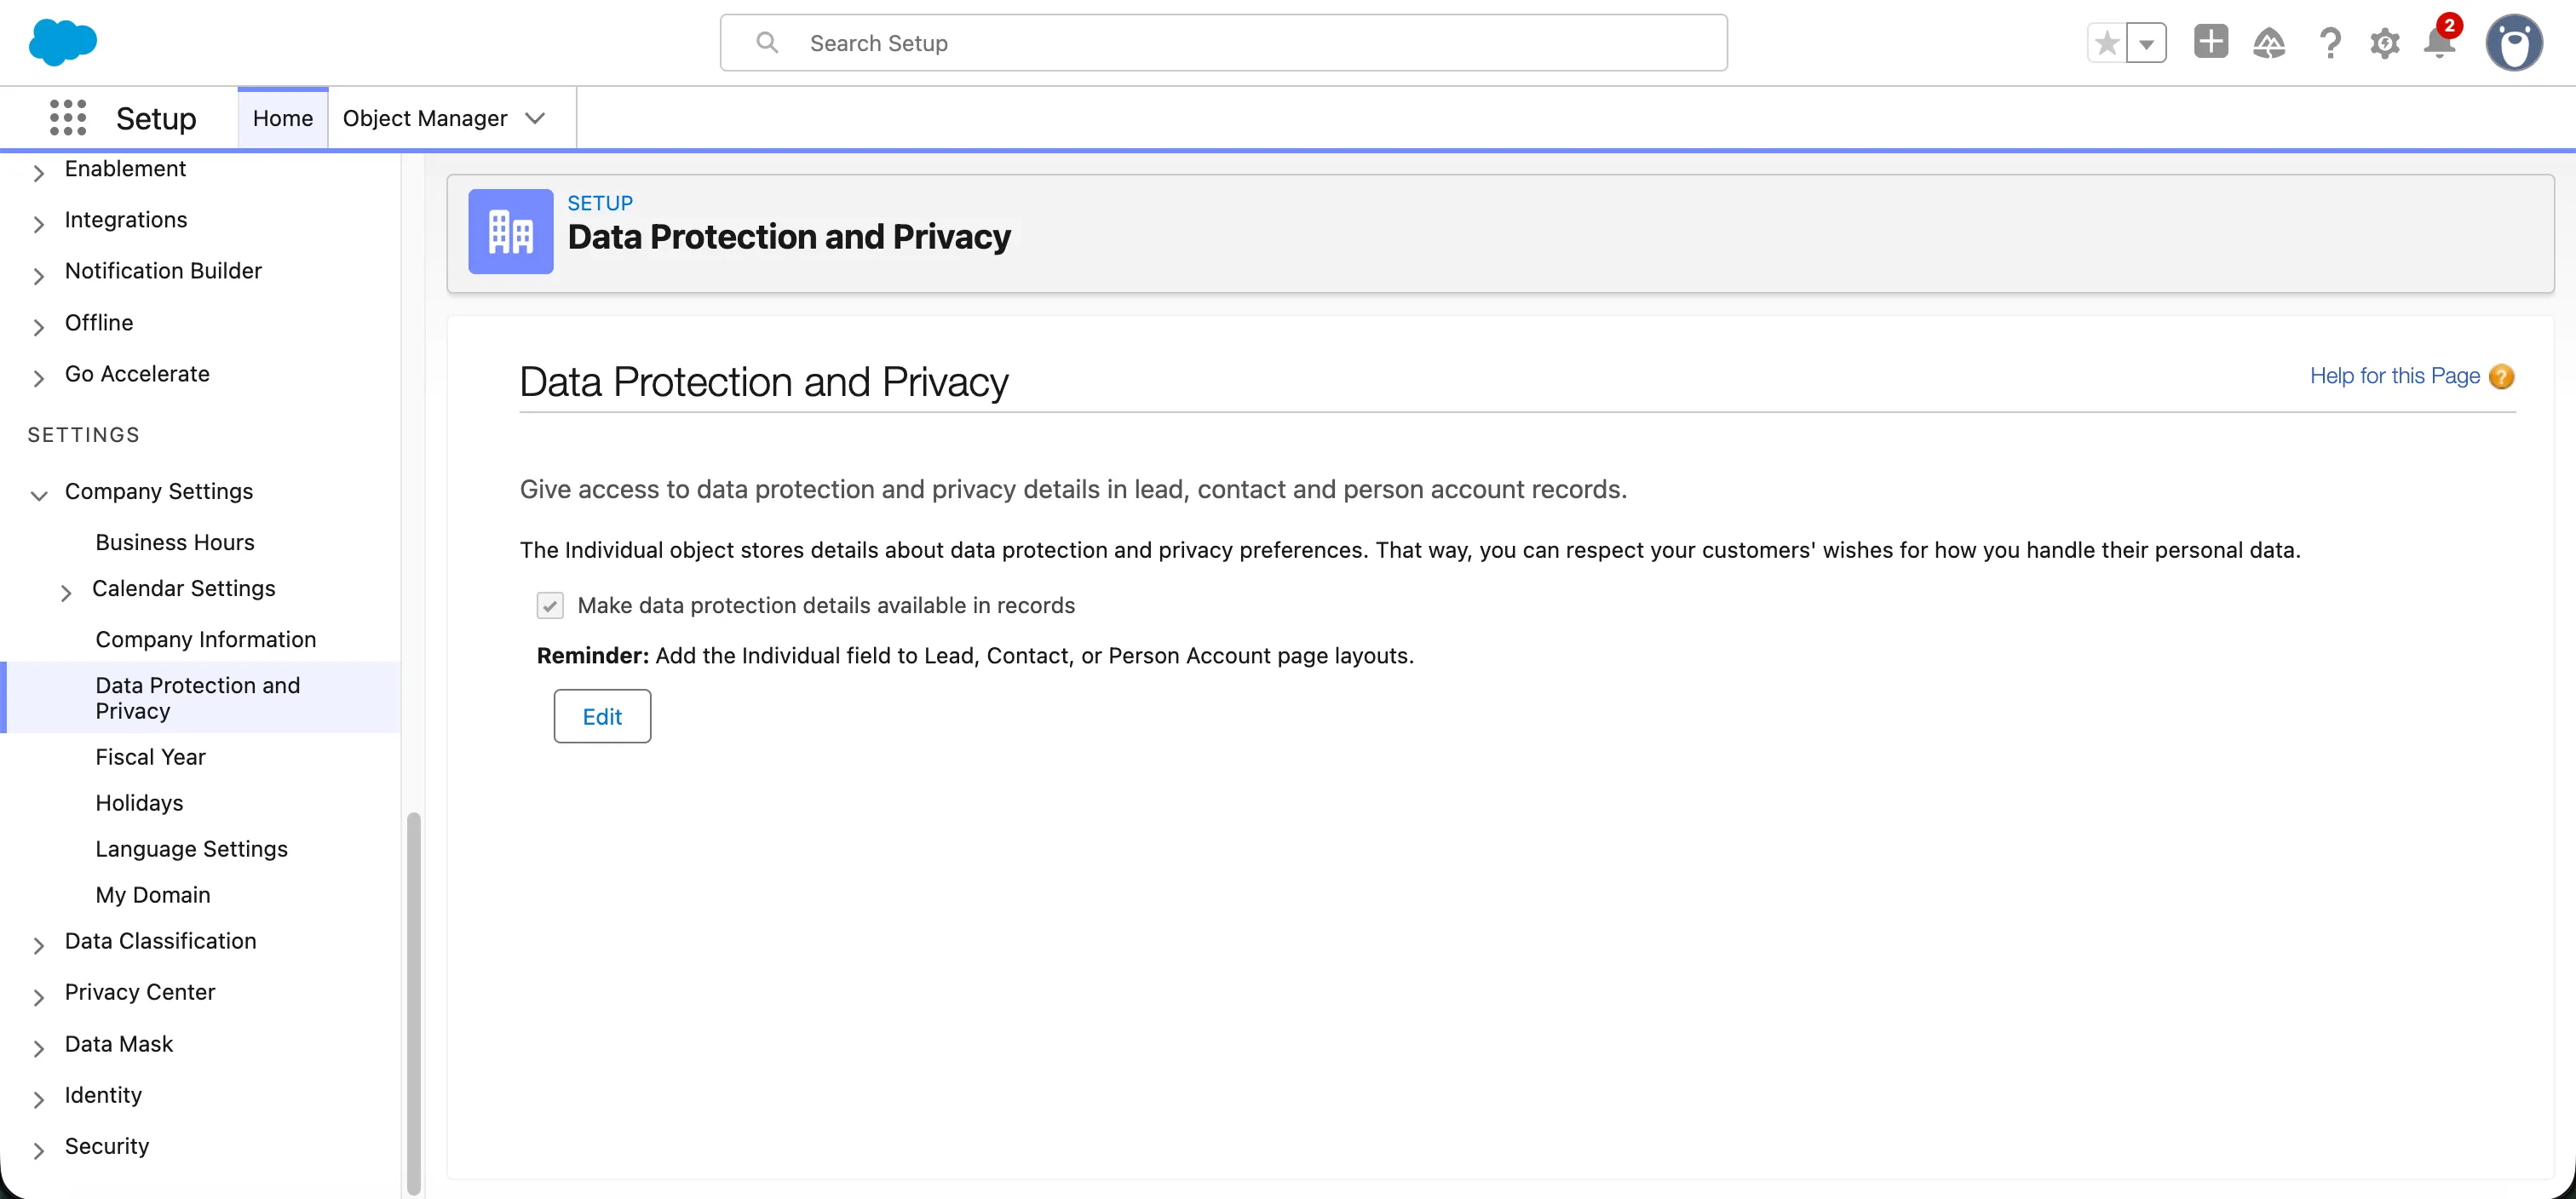
Use this rather than custom checkboxes. A checkbox cannot distinguish “declined” from “never asked,” and consent belongs to a person, not to a Contact record. Consent objects also don’t count against data storage.
Note the reminder on that screen: add the Individual field to your Lead, Contact and Person Account page layouts. The lookup exists via the API without it, but admins cannot see or set it in the UI, which makes the matching described in 5. Matching consents to people impossible to verify by hand.
You’ll write to:
| Object | Holds |
|---|---|
Individual |
The person. Anchor record and join key. |
DataUseLegalBasis |
The lawful basis — Consent, Legitimate Interest, etc. |
DataUsePurpose |
Why you are processing — Marketing, Analytics, etc. One per purpose. |
ContactPointTypeConsent |
The decision, per category per person. |
Legal basis and purposes
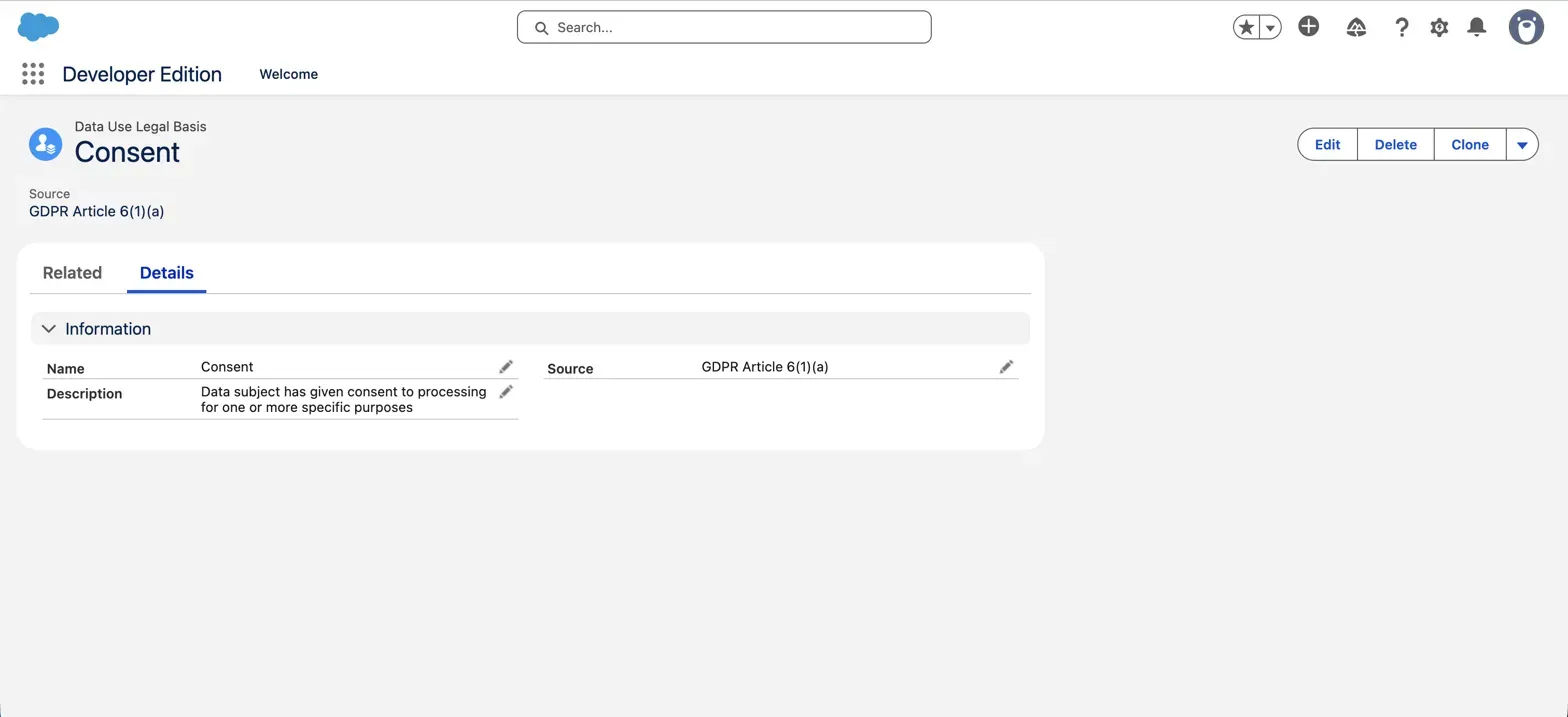
Section titled “Legal basis and purposes”Create the legal basis records first: DataUsePurpose.LegalBasisId is a lookup to DataUseLegalBasis, not a picklist, so the referenced record has to exist before a purpose can point at it. Record the statutory reference in Source — it costs nothing and answers the obvious audit question.
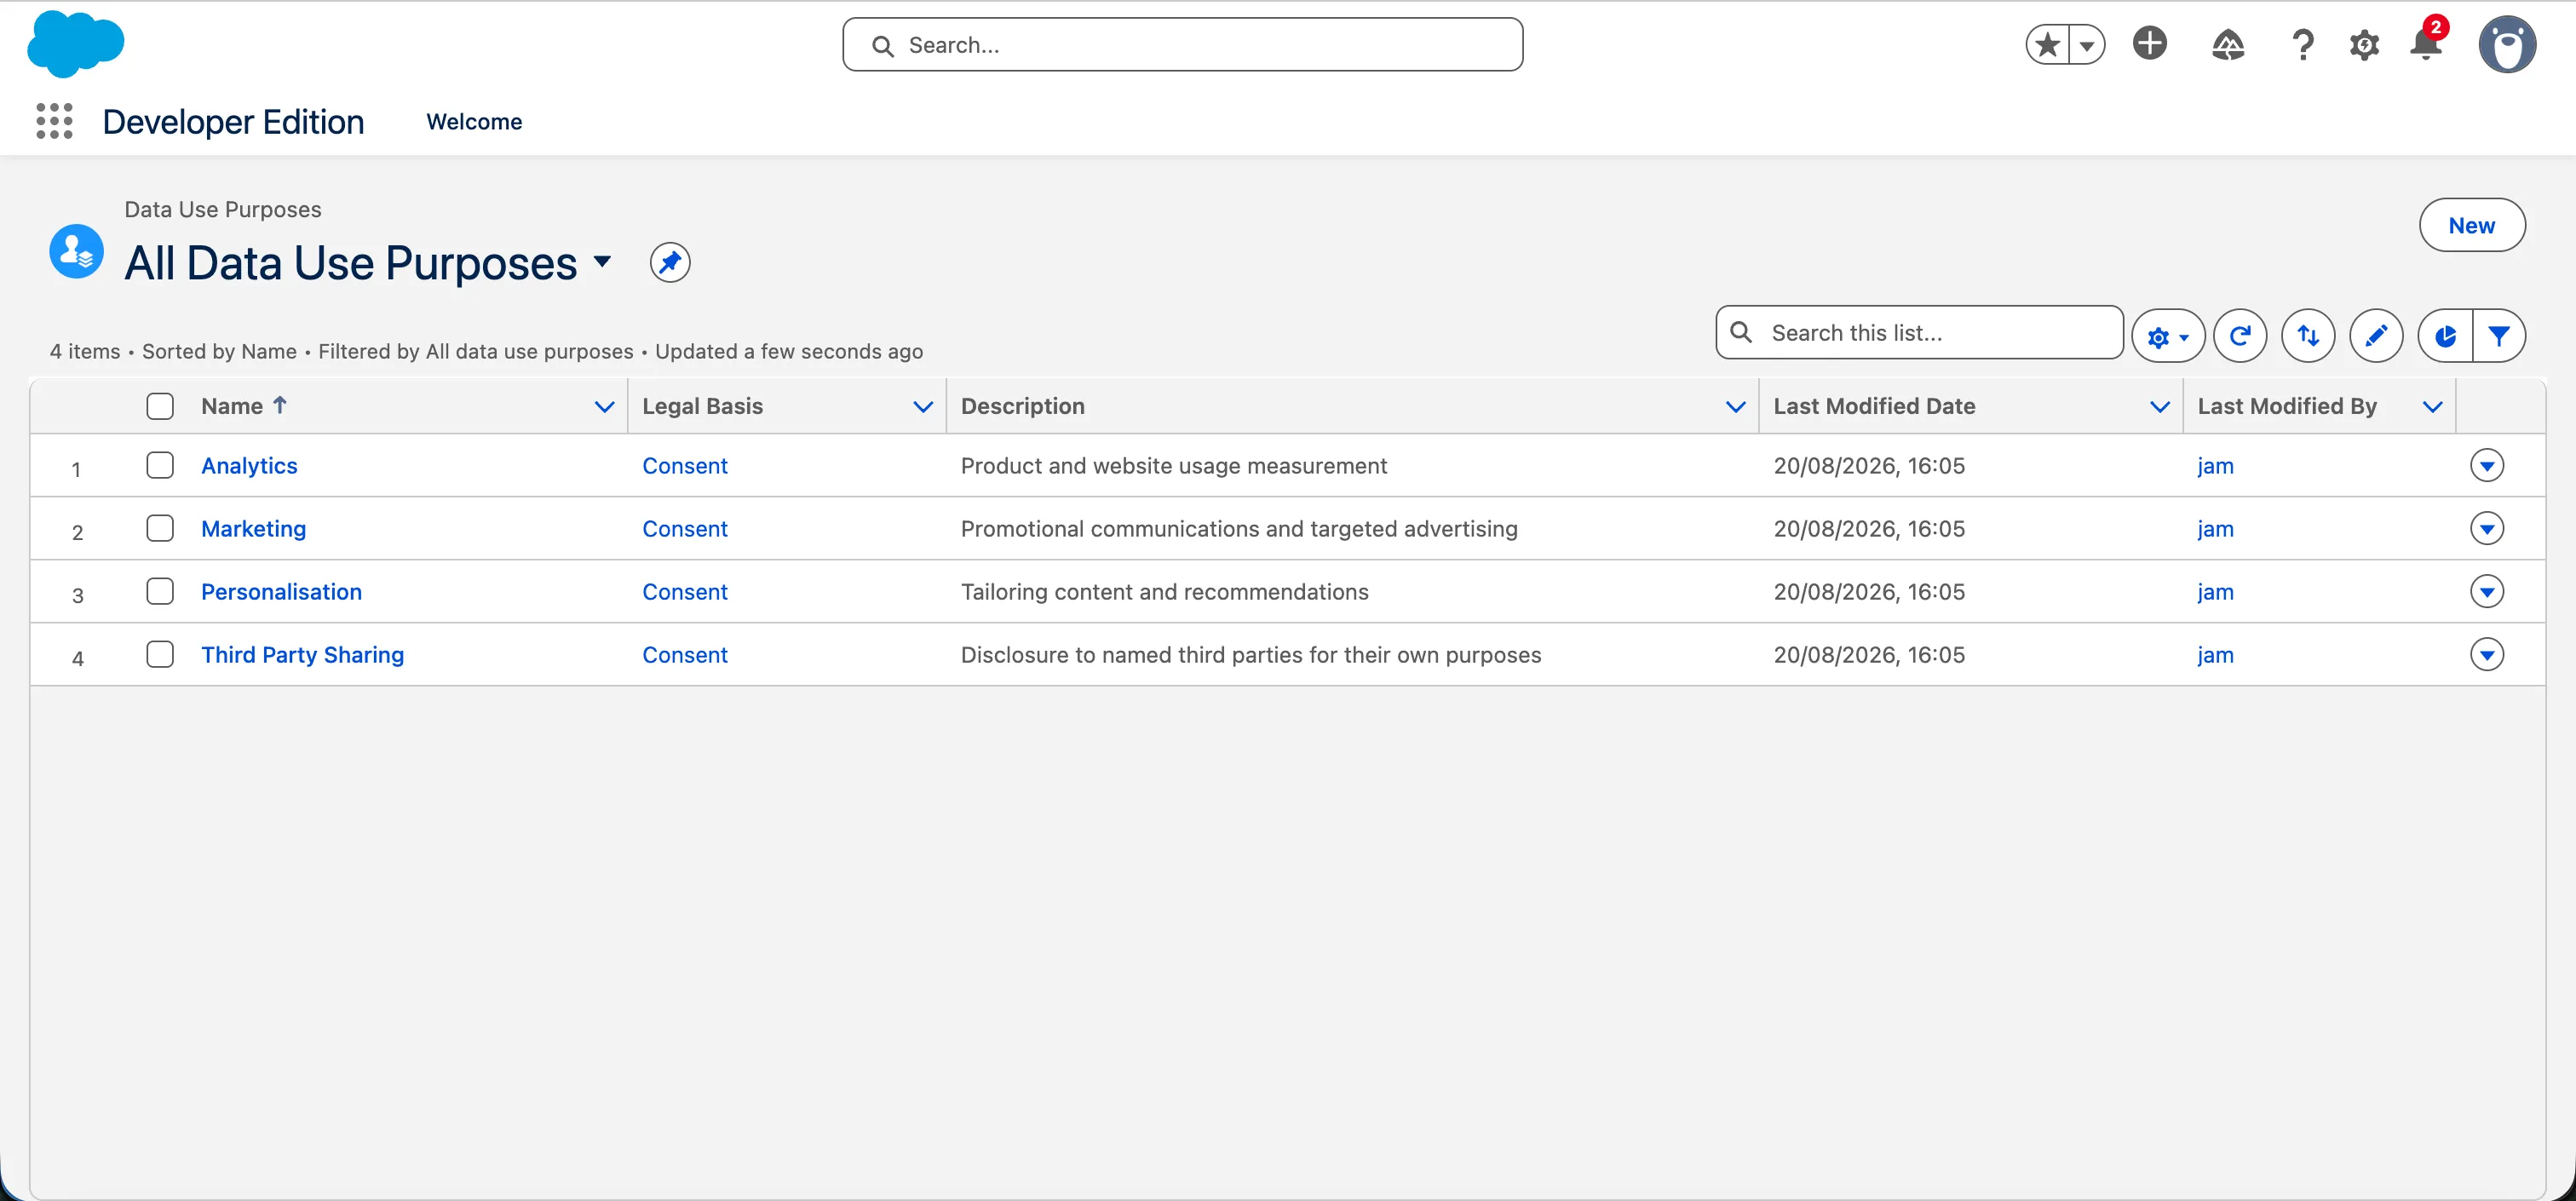
Then create one DataUsePurpose per purpose you intend to sync, each pointing at that legal basis. Set CanDataSubjectOptOut to reflect whether opt-out is actually available — true for consent-based purposes, potentially false for a legitimate-interest one.
Custom fields
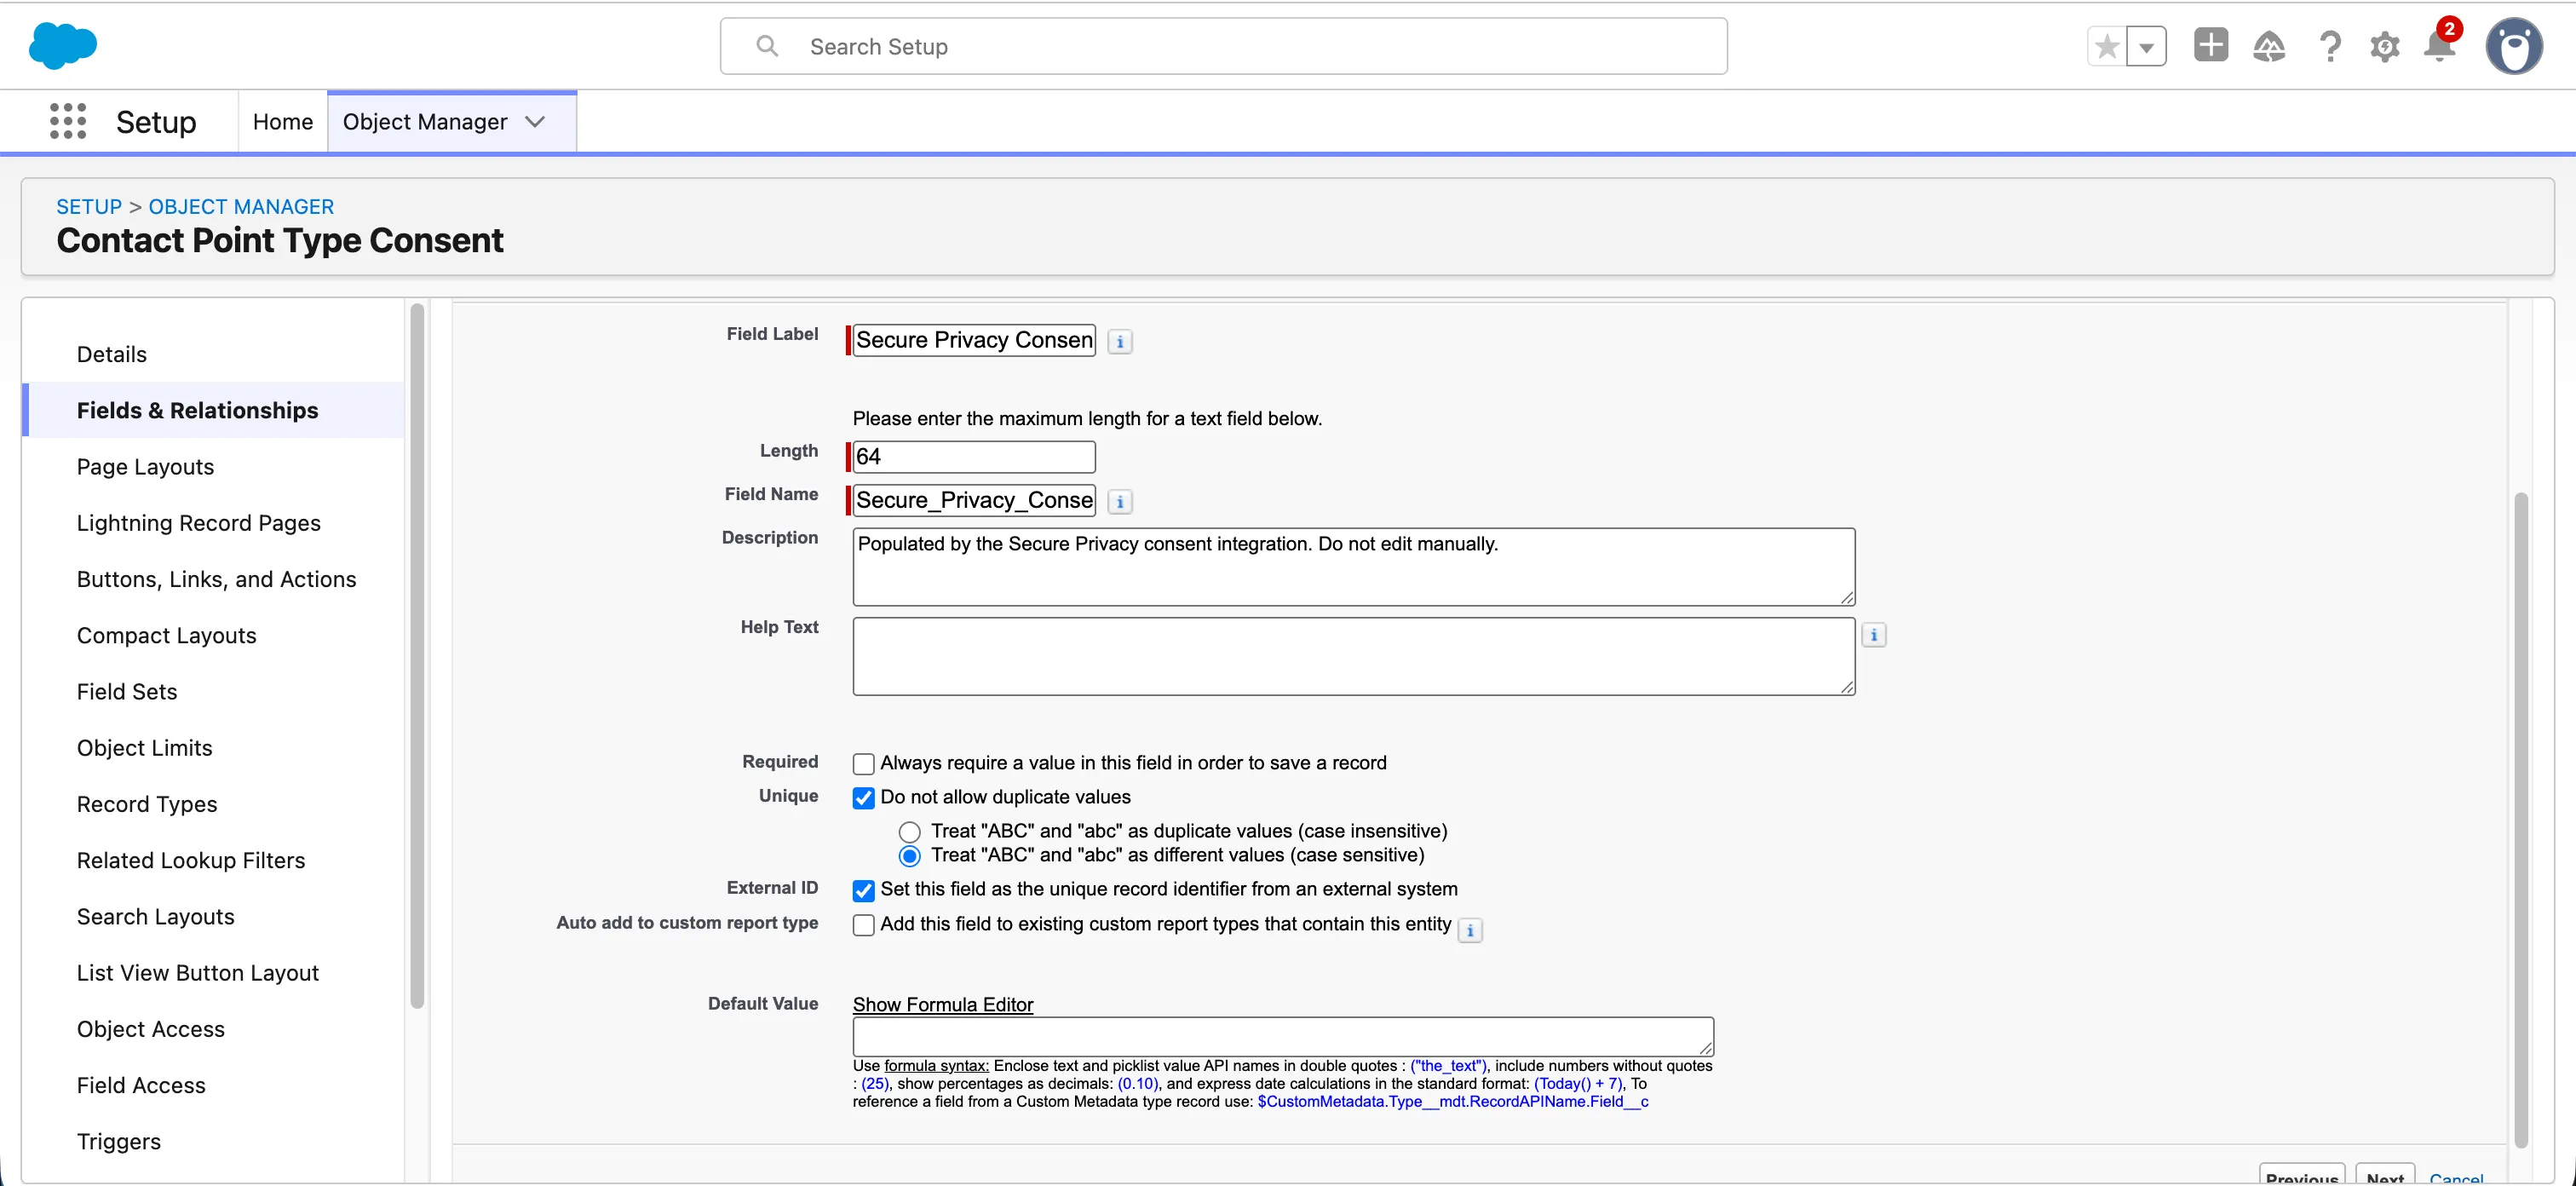
Section titled “Custom fields”Add two custom fields. Mark both as External ID and Unique. This is what lets the sync run over and over without creating duplicate records: Salesforce matches on the ID you supply and updates the existing record instead of adding another one.
| Object | Label | API name | Type |
|---|---|---|---|
Individual |
Secure Privacy Subject ID | Secure_Privacy_Subject_Id__c |
Text(128) |
ContactPointTypeConsent |
Secure Privacy Consent Key | Secure_Privacy_Consent_Key__c |
Text(64) |
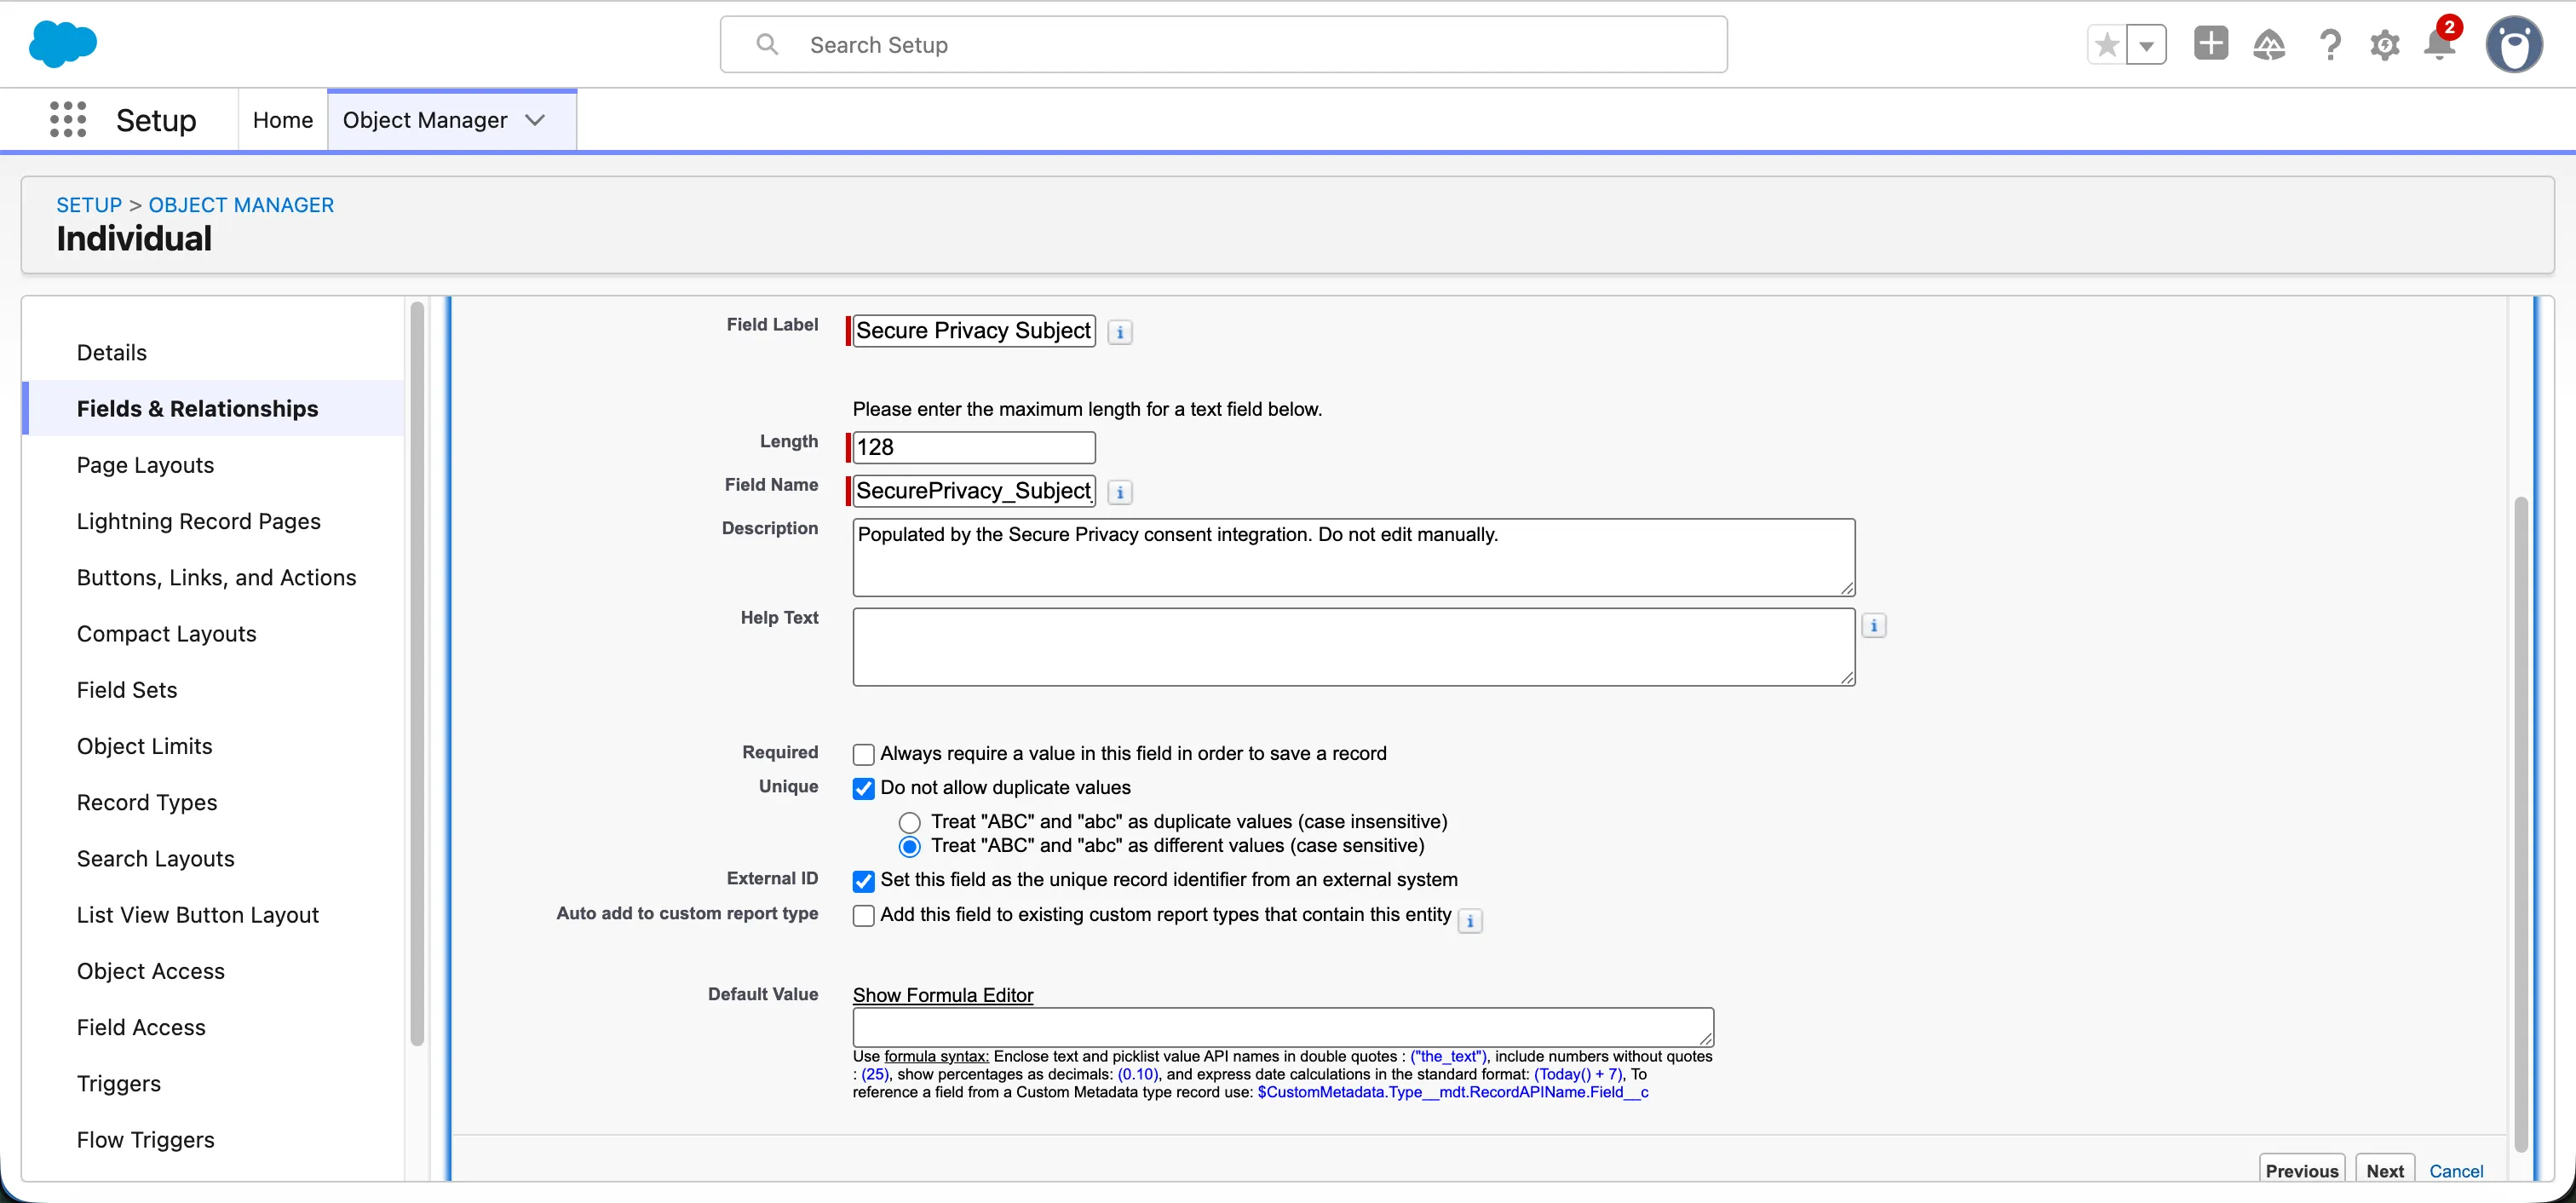
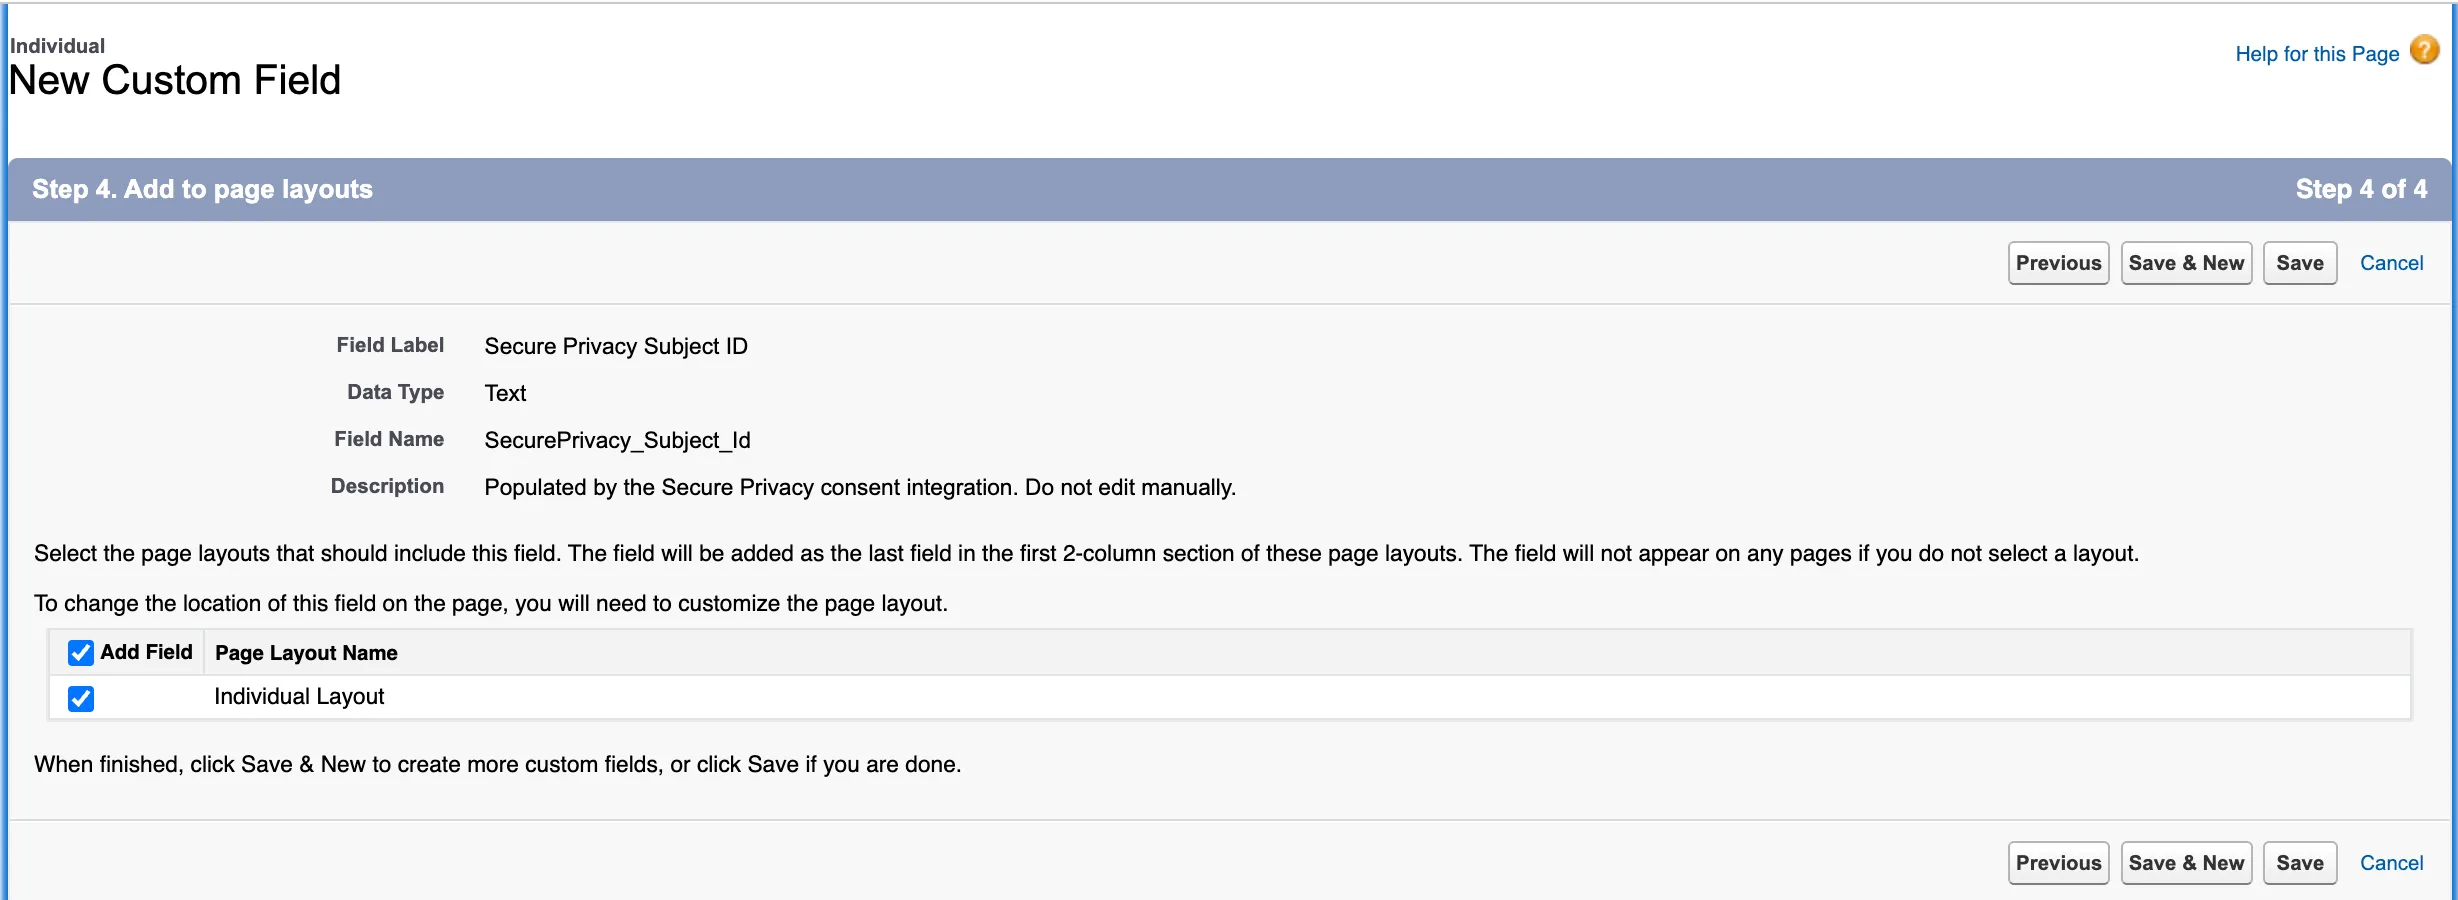
On Individual, create Secure Privacy Subject ID as Text(128):
At step 4 of the wizard, add it to the Individual layout so you can check values by eye during testing:
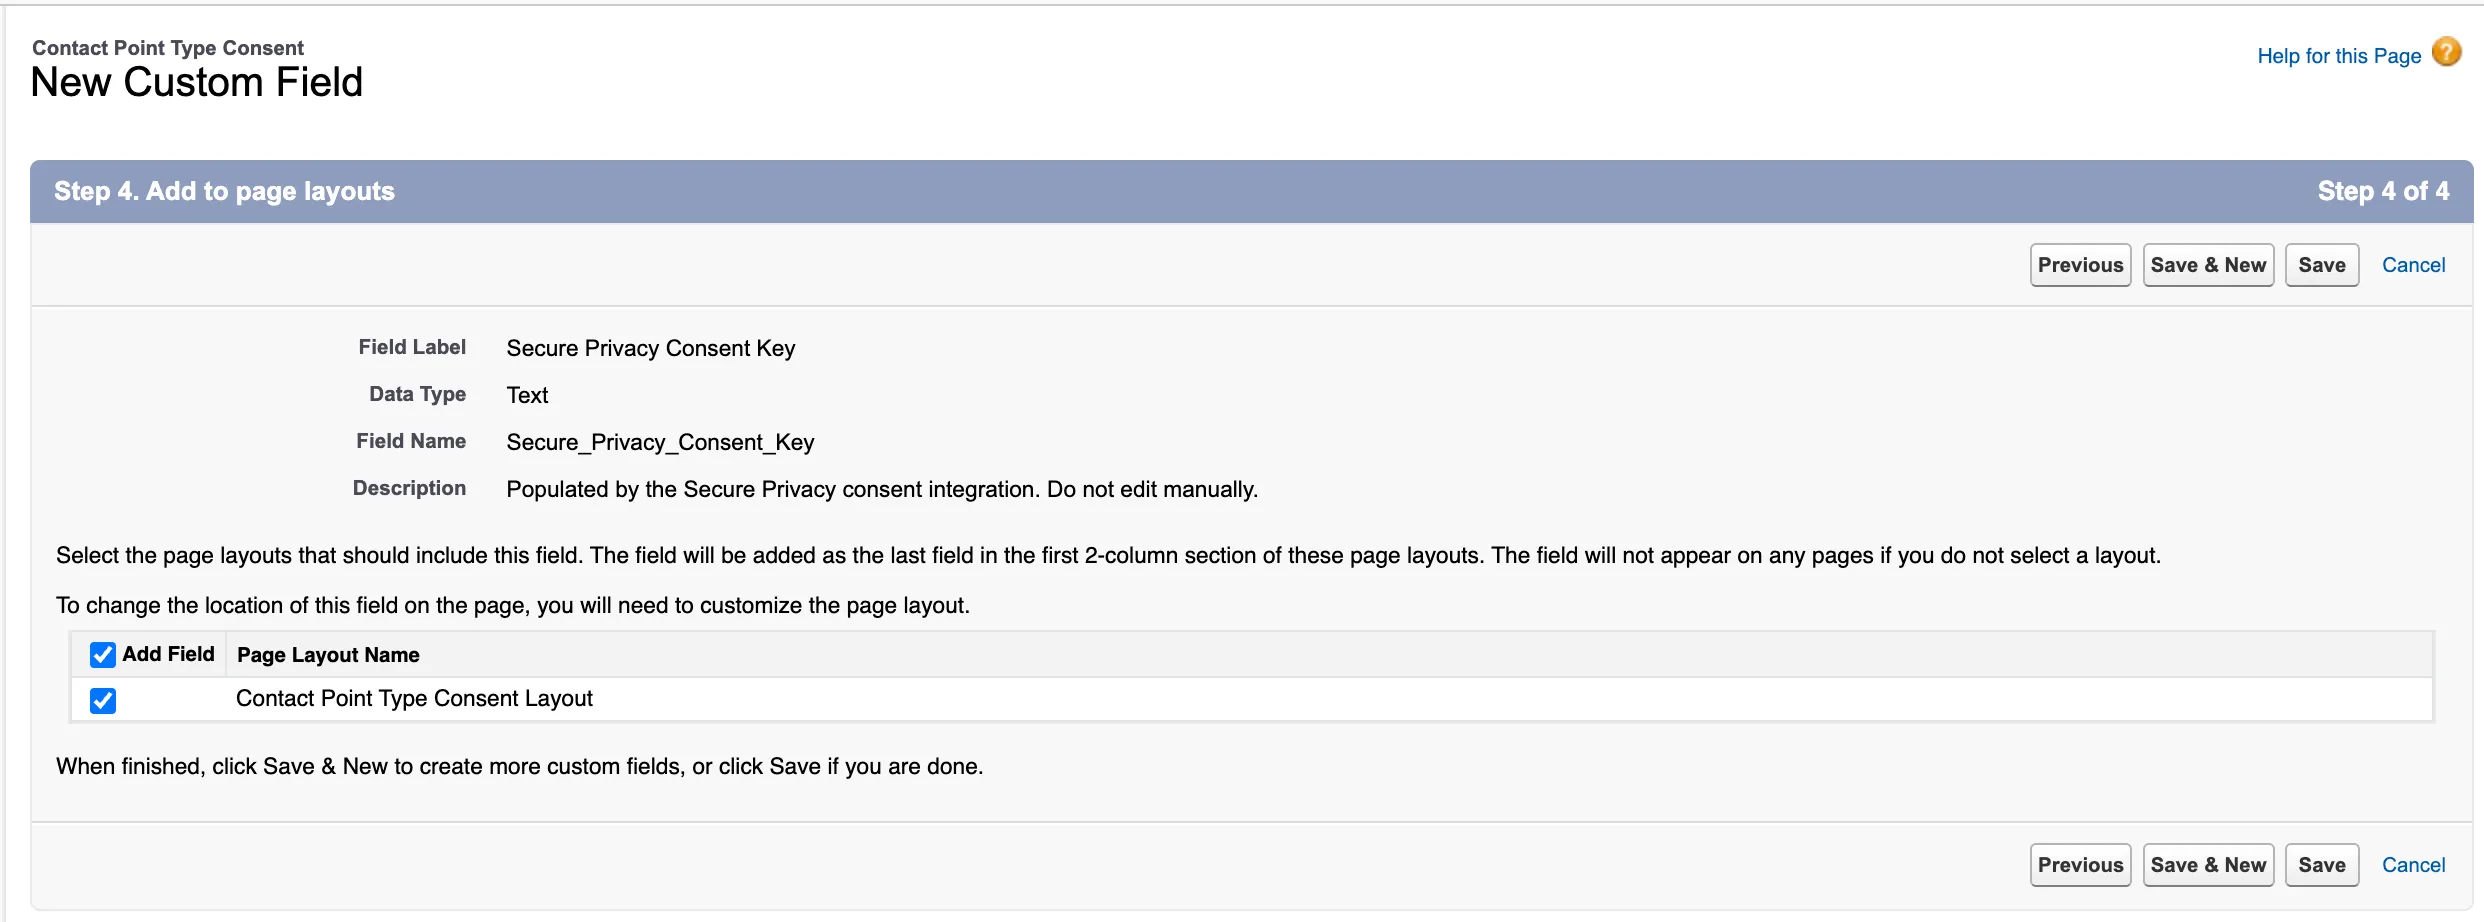
Then repeat on ContactPointTypeConsent for Secure Privacy Consent Key as Text(64) — same Unique and External ID settings:
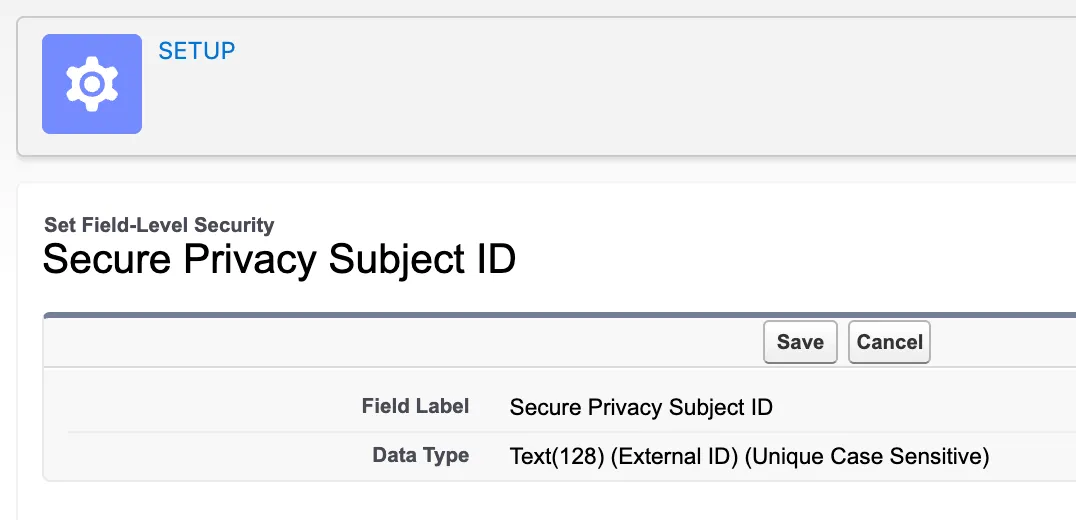
After saving, confirm the field reports all three properties — the length, External ID, and Unique Case Sensitive:
Access
Section titled “Access”Create a dedicated integration user with a permission set granting read/create/edit on the consent objects, read on Contact and Lead, API Enabled, and no delete.
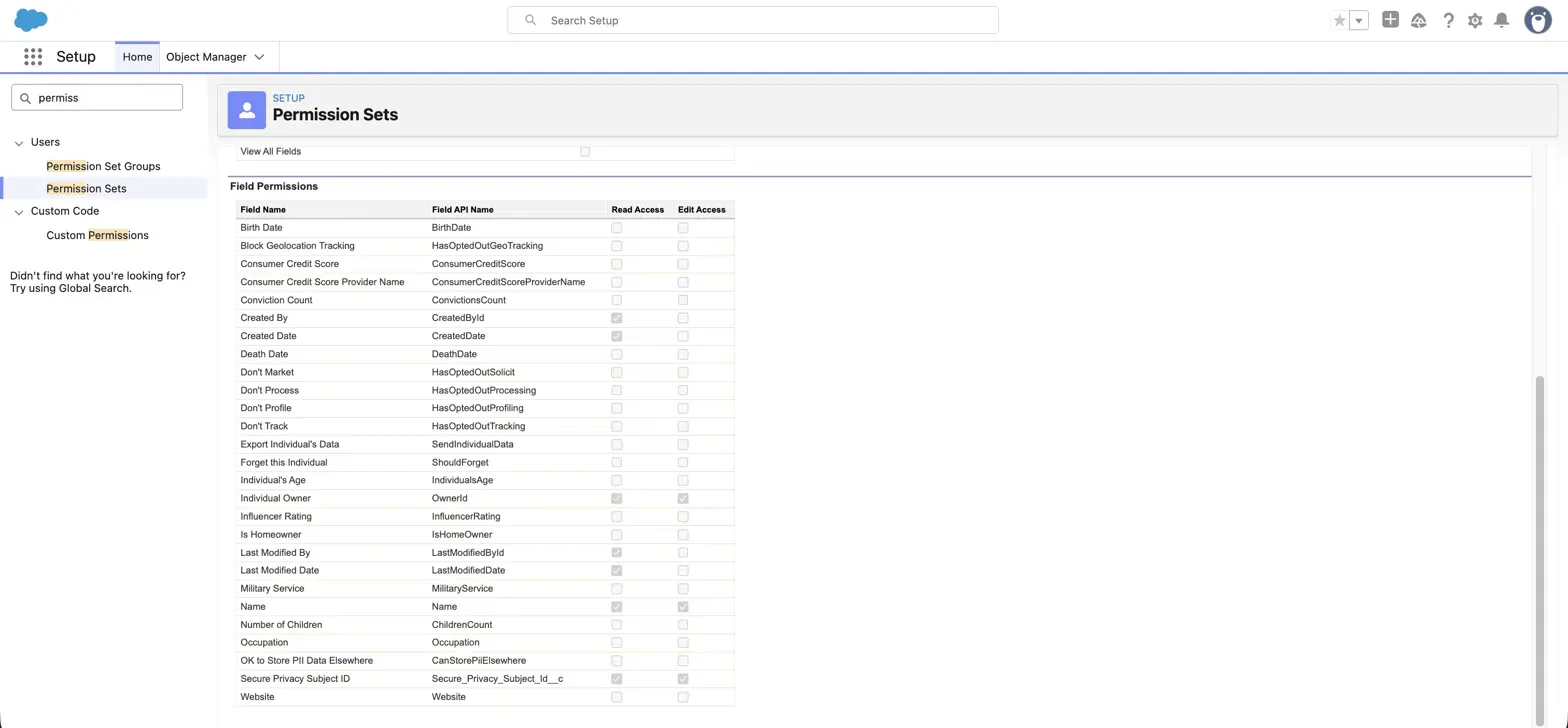
Grant field-level security on both custom fields. Missing field-level security is the most common cause of “no such column” errors — the field exists, the API just cannot see it. In the permission set, go to Object Settings → Individual → Field Permissions and tick Read and Edit for Secure Privacy Subject ID. Repeat on Contact Point Type Consent for the consent key.
Turn on field history tracking for PrivacyConsentStatus. Free audit trail.
2. Authentication
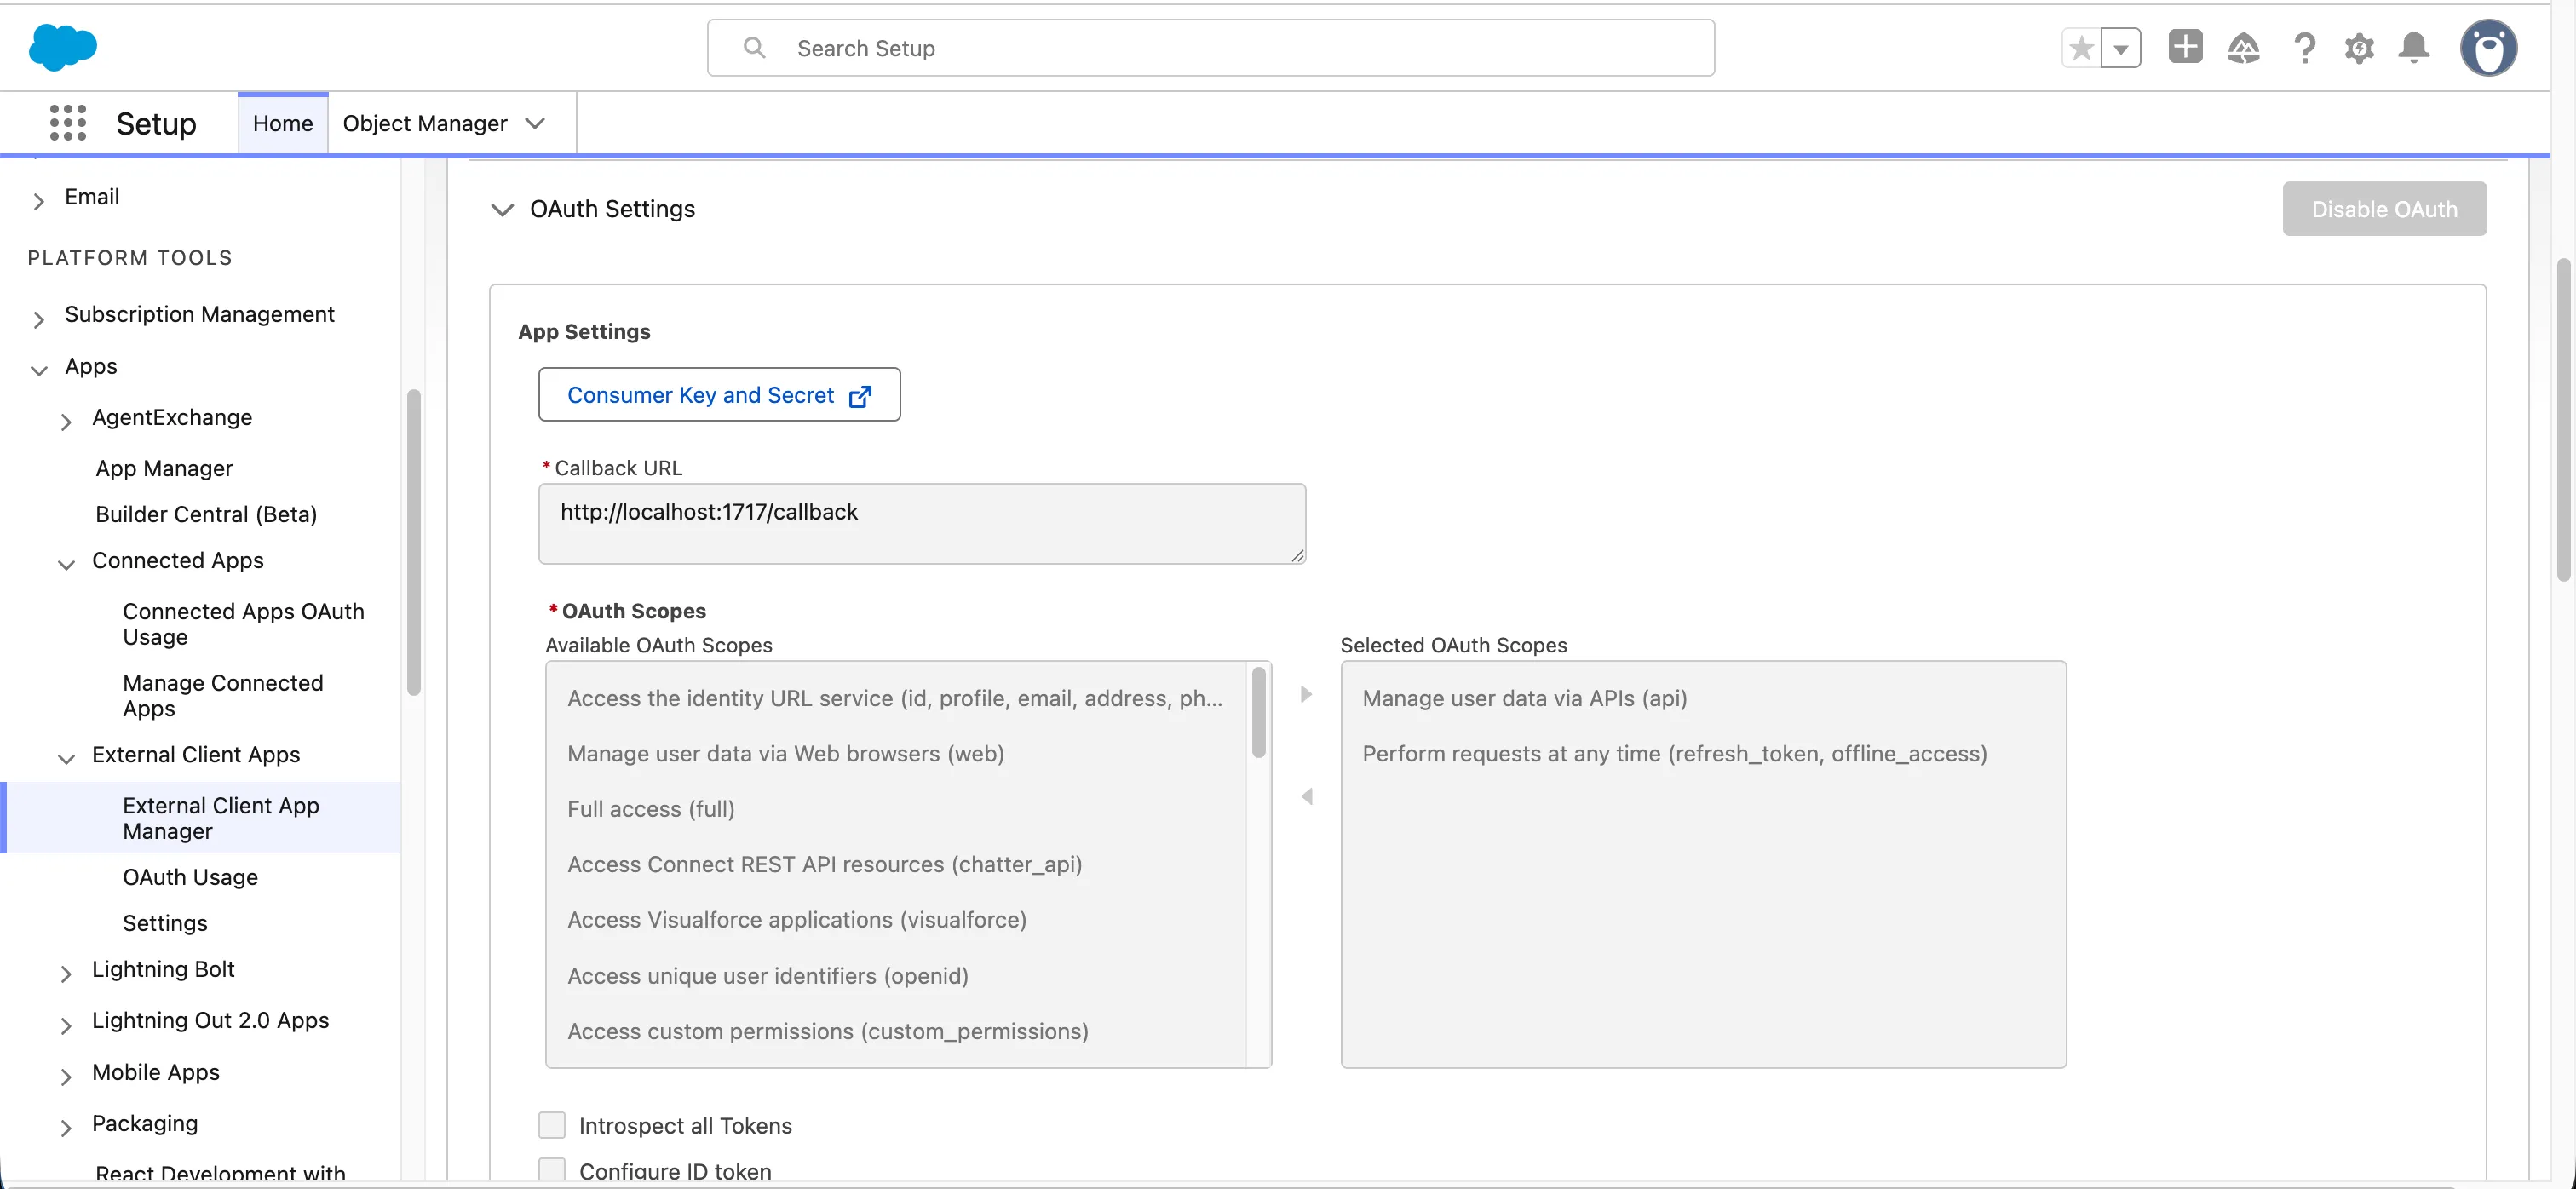
Section titled “2. Authentication”Use JWT bearer. Generate a key pair, then create an External Client App: App Manager → New External Client App. Enable OAuth, set a callback URL (unused by this flow, but the form requires one), and select the scopes api and refresh_token offline_access.
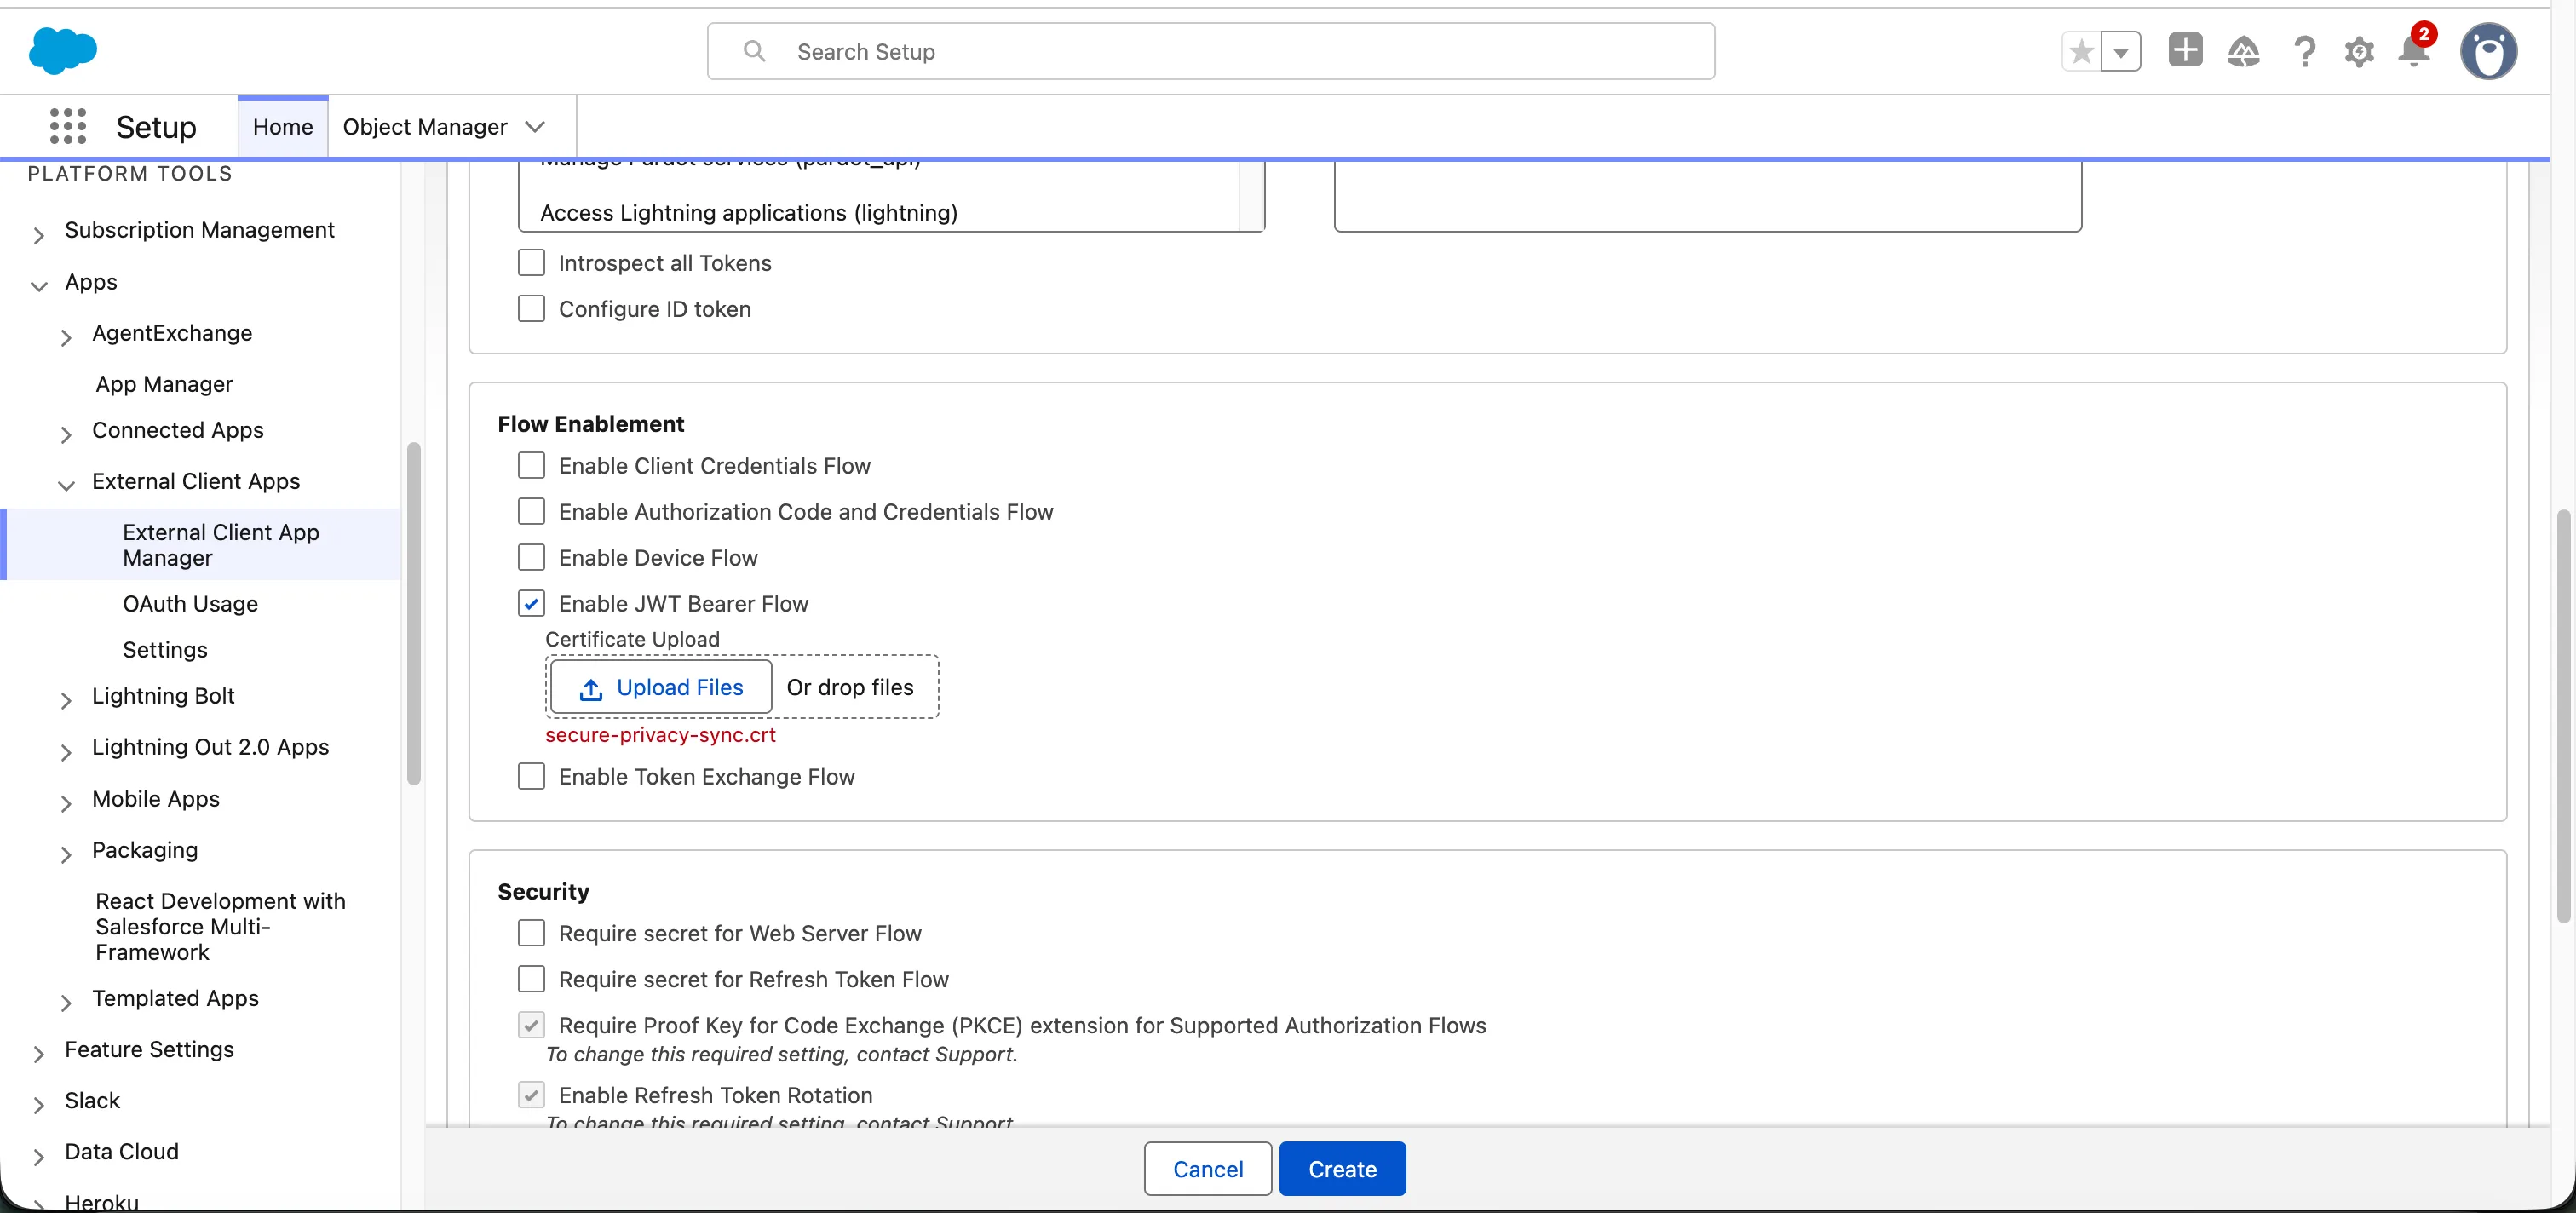
Further down the same form, under Flow Enablement, tick Enable JWT Bearer Flow — that is what reveals the certificate upload. Keep the private key in a secret manager, and note the certificate expiry: an expired signing certificate is a silent, total outage.
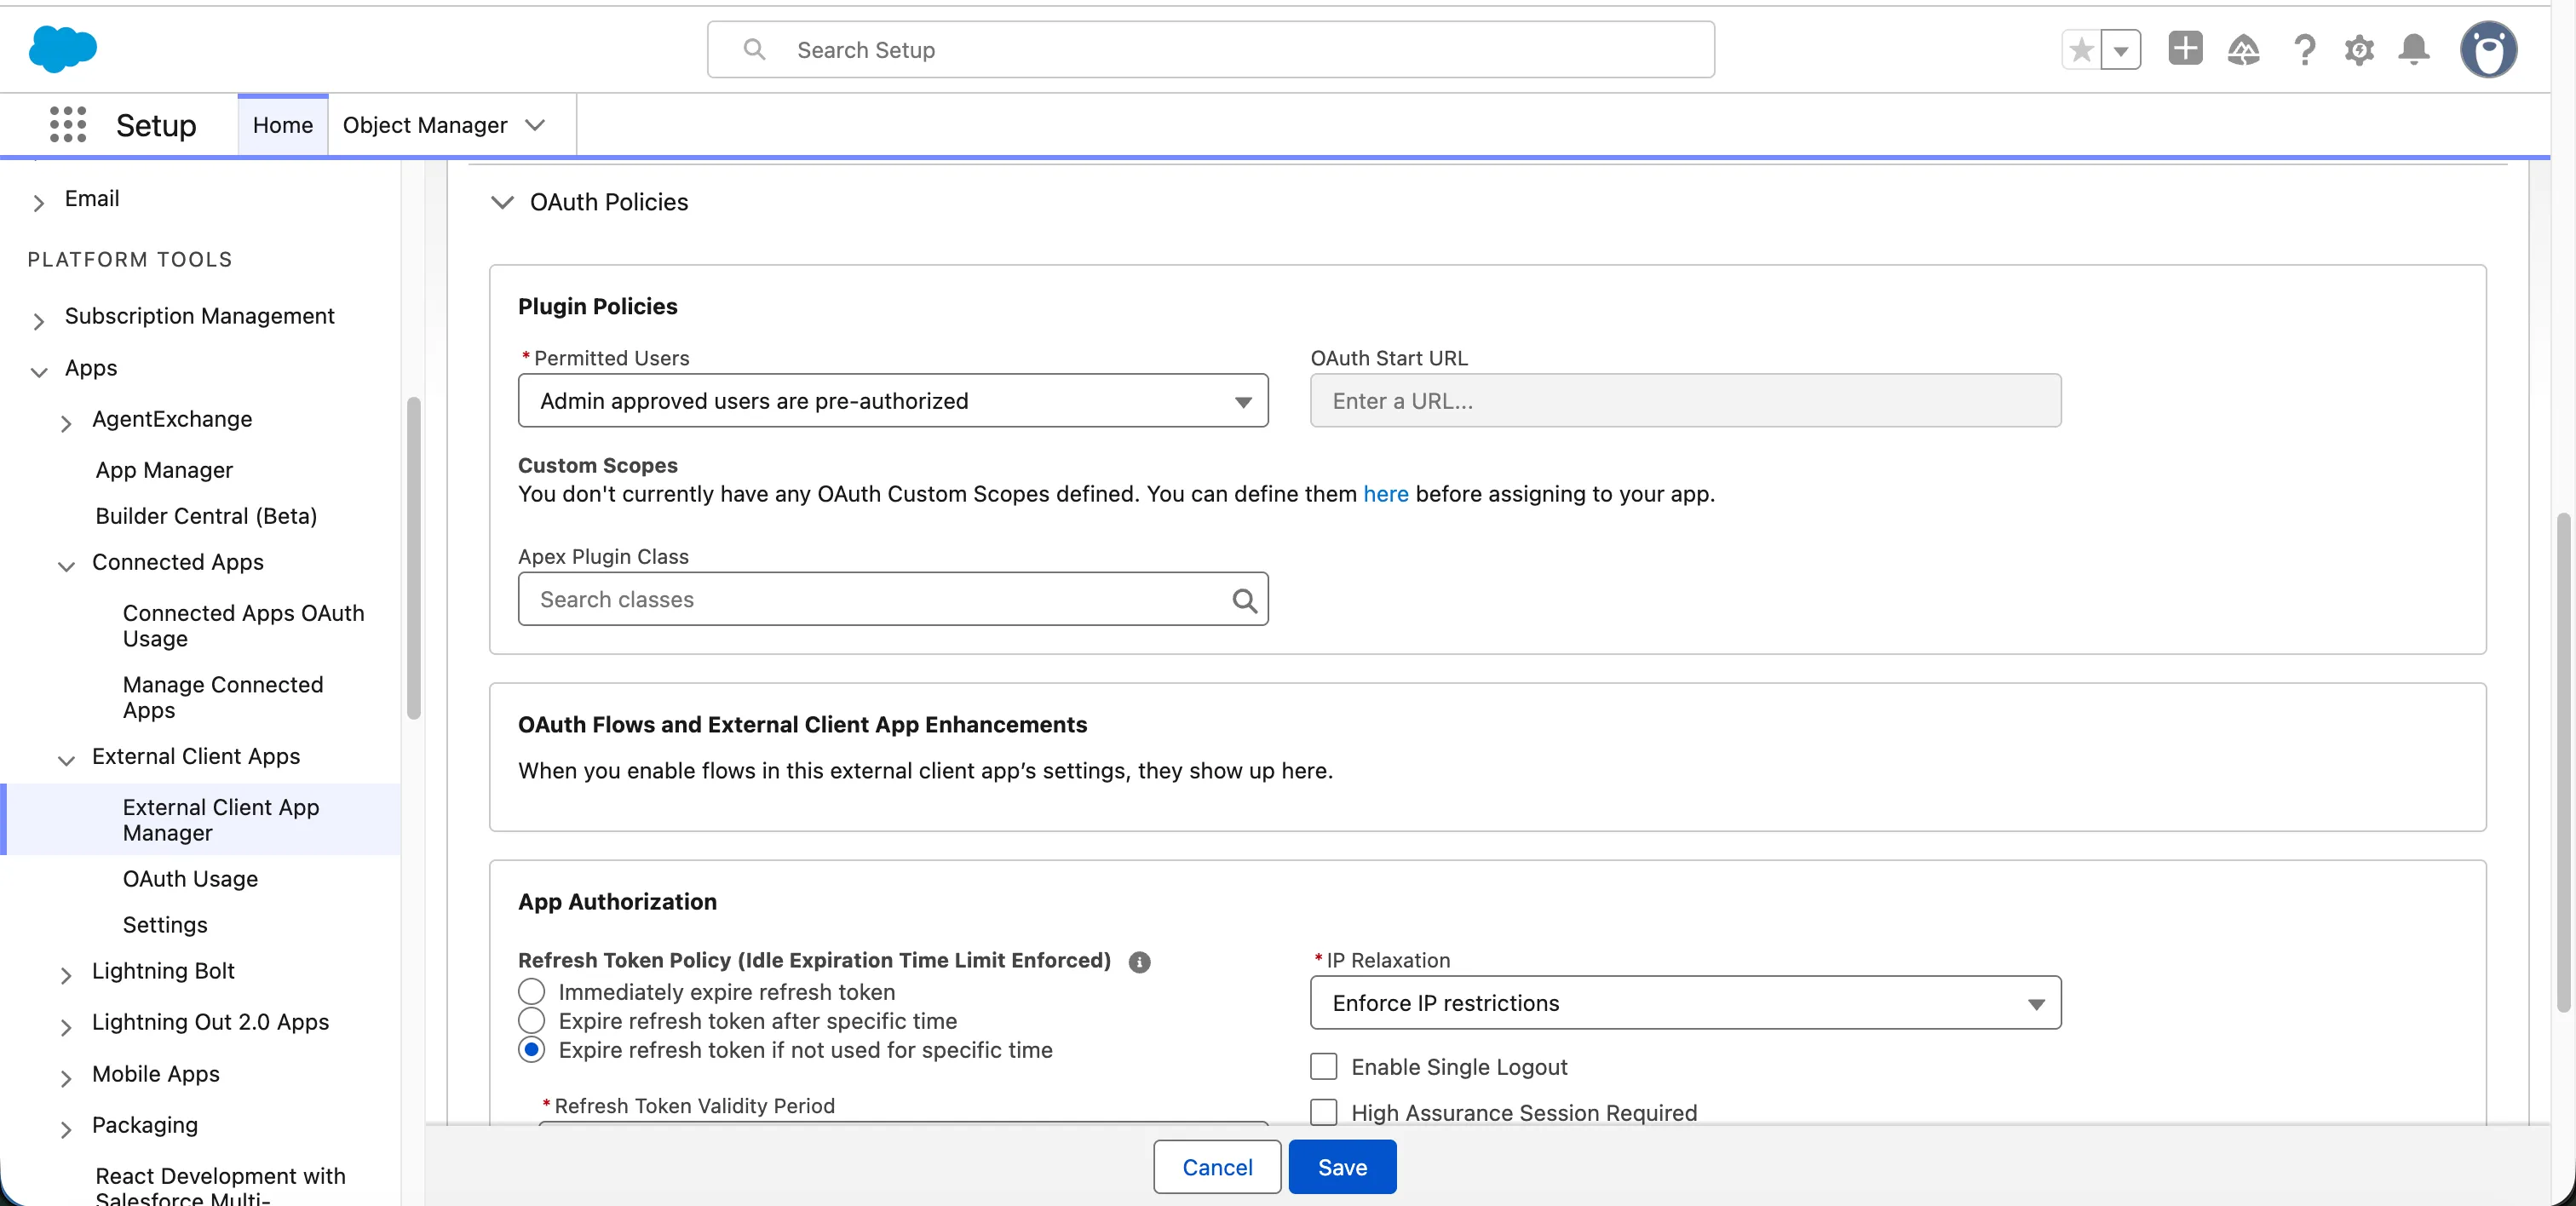
After saving, set Permitted Users to Admin approved users are pre-authorised under Policies → OAuth Policies, then assign the integration user’s permission set to the app. Missing this step produces a bare invalid_grant with no useful detail, and it is the most common reason a correctly configured certificate still fails.
// Token acquisition + refresh. Cache it, but refresh on expiry -- a one-way// isConnected flag means every call fails after the session times out until// someone restarts the process.let cached: { token: string; instanceUrl: string; at: number } | null = null;const REFRESH_AFTER_MS = 20 * 60 * 1000;
async function getConnection(force = false): Promise<Connection> {  if (force || !cached || Date.now() - cached.at > REFRESH_AFTER_MS) {    const assertion = jwt.sign(      {        iss: config.clientId,        sub: config.integrationUsername,        aud: config.loginUrl,          // test.salesforce.com for sandboxes        exp: Math.floor(Date.now() / 1000) + 180,      },      config.privateKey,      { algorithm: 'RS256' },    );
    const res = await fetch(`${config.loginUrl}/services/oauth2/token`, {      method: 'POST',      headers: { 'Content-Type': 'application/x-www-form-urlencoded' },      body: new URLSearchParams({        grant_type: 'urn:ietf:params:oauth:grant-type:jwt-bearer',        assertion,      }),    });    if (!res.ok) throw new Error(`JWT exchange failed: ${res.status}`);
    const data = await res.json();    cached = { token: data.access_token, instanceUrl: data.instance_url, at: Date.now() };  }
  return new Connection({    instanceUrl: cached.instanceUrl,    accessToken: cached.token,    version: '67.0',  });}
// Retry once on session expiry.async function withSession<T>(fn: (c: Connection) => Promise<T>): Promise<T> {  try {    return await fn(await getConnection());  } catch (e: any) {    if (e?.errorCode !== 'INVALID_SESSION_ID') throw e;    return fn(await getConnection(true));  }}
Verify the whole chain before writing any integration code — sf org login jwt with the same certificate, client ID and username will succeed only if the certificate, the flow toggle and the permitted-users policy are all correct together.
Client credentials is a valid simpler alternative — enable it on the app, set Run As to the integration user, swap grant_type for client_credentials with client_id/secret. Everything downstream is identical. The trade-off is a long-lived secret instead of a certificate.
Use jsforce v3 (import { Connection } from 'jsforce' — no default export) and don’t install @types/jsforce; v3 ships its own types and the two conflict.